In this photography lesson we look at another one of the digital camera features-stitch assist. Stitch assist mode is now available on many advanced digital cameras and is designed for shooting panoramas in sections.

These sections are then stitched together into one single and seamless photograph.
The stitching process is done on your computer with special software which is sometimes included with the camera. You can also purchase software programs which allow you to do panoramic photos with any standard camera.
Photographers have been shooting panoramas for years. The scene would be shot as a series of single photos, then joined together into one panoramic picture.
How well the final image turned out depended greatly on the skill of the photographer or lab technician. Computer software changed all that.
Computer software programs are available that allow seamless panoramas to be made with a regular camera. The stitch assist feature on digital cameras, combined with this software, make creating this type of shot quite easy, but a few guidelines will help insure that the final image looks like one single photo, or “seamless”.
Guidelines For Shooting Panoramas
- You need to keep the camera as level as possible for each picture. Using a tripod with panning head is ideal.
- Turning your camera vertically to shoot a horizontal panorama will provide more height in your image, but will require more shots to cover the scene.
- Take your white balance setting off Auto and use Cloudy Daylight … If you use auto white balance, the color could change during the sequence.
- The camera should remain in the same spot for the entire sequence. Rather than change your position, you will rotate the camera horizontally or vertically for each shot.
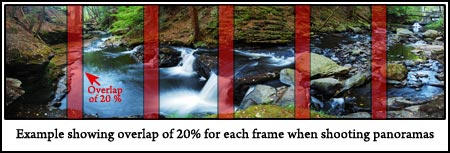
- Overlap each image in the sequence by a minimum of 20% or more horizontally and keep the vertical alignment around 10% or less.
- It is helpful to include a distinctive object in each overlapping section. This will make it easier for the software to know how to combine the images.
- Once you have determined the correct exposure, turn off Auto Exposure and set the f-stop and shutter speed manually, or use aperture priority if you don’t have manual on your camera.
- Use a cable release or your self-timer for each exposure to avoid any camera shake.
OK, the above guidelines are helpful if you are using most of the available stitching software programs. However, if you are serious about shooting panoramas and own photoshop CS3 or CS4, then the only real requirement is to overlap the frames by about 20%. You won’t even need a stitch assist mode on your camera.

Photomerge in CS3 CS4 does an excellent job of stitching together your frames, and it will even blend the colors of each frame so they are consistent. Photoshop CS & CS2 do a great job as well, as long as you follow the above guidelines.
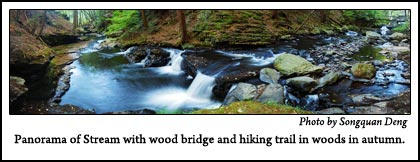
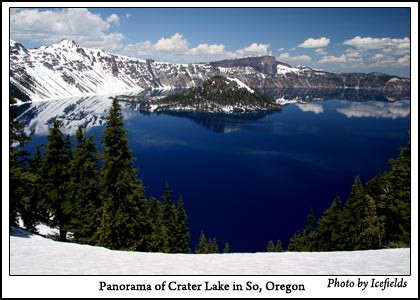
Here are two more examples of excellent panorama shots …


Here’s to better photography…

Al Hannigan


Excellent explanation.
thank you so much
Great tutorial! I’m heading to Vancouver Island in two weeks and have never been very happy with my attempts at Stitch Assist/Panoramic photos in the past. I think I will be much more successful now!
Any tips on white balance for panoramic shots with a mixture of shade and sun?